Sewer Line Repair: The Complete Homeowner's Guide (2026)
From the first warning sign to the final backfill — everything you need to know about diagnosing, pricing, and fixing a broken sewer line without getting ripped off.
A broken sewer line is one of the most stressful (and expensive) problems a homeowner can face. But with the right knowledge, you can catch problems early, avoid panic-driven decisions, and potentially save thousands of dollars by knowing exactly what to ask for and what to pay.
- Warning Signs of a Broken Sewer Line
- Common Causes of Sewer Line Damage
- Getting a Sewer Camera Inspection
- DIY vs. Professional Repair
- Repair Methods Compared
- Real Cost Breakdown (2026)
- How to Hire the Right Contractor
- Insurance & What's Covered
- Prevention & Ongoing Maintenance
- Frequently Asked Questions
1. Warning Signs of a Broken Sewer Line
Your sewer line is buried underground, so you can't see it failing — but your house gives clear signals. Catching these early can mean the difference between a $400 repair and a $8,000 replacement.
The 7 Key Warning Signs
- Multiple slow drains at once. One slow drain is usually a localized clog. When multiple drains — sink, tub, toilet — slow down simultaneously, the problem is downstream in the main line.
- Gurgling sounds from toilets or drains. Air trapped by a partial blockage makes your pipes gurgle, especially when another fixture is used nearby.
- Sewage odors inside the home. A properly functioning sewer is sealed. Persistent odors inside mean cracked pipe or a failed wax seal.
- Sewage odors or wet patches in the yard. Underground leaks saturate the soil. Watch for unusually green grass stripes or mushy ground over the sewer line path.
- Toilets backing up or needing frequent plunging. If your toilet backs up regularly despite no obvious blockage, it's a main line signal.
- Sewage backup in floor drains or bathtubs. Raw sewage appearing at your lowest drains is a serious warning — stop using water immediately and call a plumber.
- Foundation cracks or settling. Long-term leaks undermine soil and can cause foundation movement. This is a late-stage sign.
If sewage is backing up into your home through floor drains or tubs, this is a plumbing emergency. Stop using all water fixtures immediately and call a licensed plumber. Sewage exposure poses serious health risks.
2. Common Causes of Sewer Line Damage
Understanding why sewer lines fail helps you prevent future damage and negotiate better with contractors.
Tree Root Intrusion
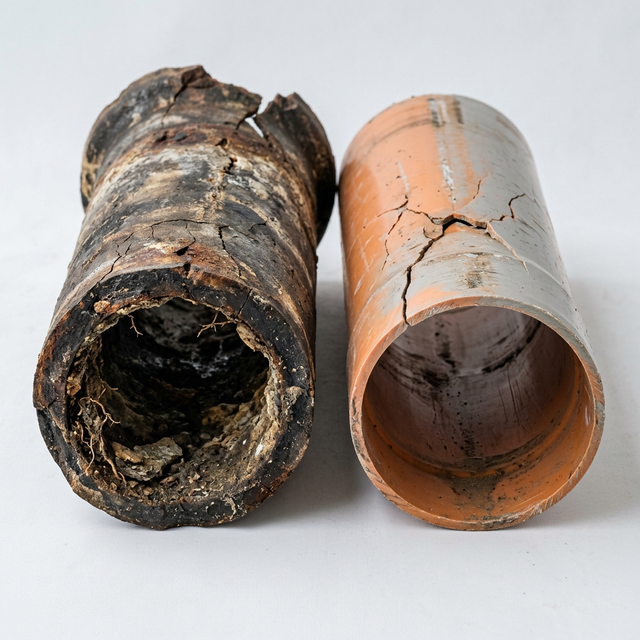
Tree roots are the #1 cause of sewer line damage in residential properties. Roots seek moisture and can enter pipes through tiny hairline cracks or loose joints, then grow inside the pipe until they cause a full blockage or pipe collapse. Clay and concrete pipes are most vulnerable. Read our full guide to tree root intrusion →
Age and Pipe Material
The expected lifespan varies dramatically by material:
| Pipe Material | Typical Lifespan | Common Failure Mode |
|---|---|---|
| Clay / Vitrified Clay | 50–60 years | Cracks, root intrusion, joint separation |
| Cast Iron | 75–100 years | Corrosion, scaling, eventual collapse |
| Orangeburg (tar fiber) | 50 years (often fails sooner) | Delamination, structural collapse |
| PVC / ABS Plastic | 100+ years | Joint failure, improper installation |
| Concrete | 50–75 years | Cracks, root intrusion, corrosion |
Ground Movement and Settling
Soil shifts over decades. Earthquakes, drought, heavy rain, nearby construction, and poor initial installation can all cause sewer pipes to sag, separate at joints, or collapse entirely. A sagging section — called a "belly" — collects waste and causes recurring blockages.
Grease, Debris, and Flushing Wrong Items
FOG (fats, oils, and grease) coats pipe walls and gradually narrows the flow channel. Combined with hair, wipes (marketed as "flushable" but not truly safe for pipes), and paper products, this creates severe blockages that eventually damage pipe walls.
"Flushable" wipes, feminine hygiene products, cotton balls, paper towels, cooking grease, or any medication. Only toilet paper and human waste should enter your sewer line.
3. Getting a Sewer Camera Inspection
A sewer camera inspection is the single best investment you can make before authorizing any repair. A licensed plumber runs a waterproof camera through your main sewer line and records what they find. Cost: $150–$400.
A proper inspection report should tell you:
- Exact location and depth of any damage
- Length of pipe affected
- Pipe material and condition throughout
- Whether damage is localized (spot repair) or extensive (full replacement)
- Presence of tree roots, grease buildup, or bellies
Always request a copy of the camera inspection video. A reputable plumber will provide it without charge. This protects you from overdiagnosis and gives you documentation for insurance claims or future reference.
4. DIY vs. Professional Repair
Knowing the boundary between what you can safely tackle yourself and what absolutely requires a professional will save you time, money, and potential code violations.
| Task | DIY? | Notes |
|---|---|---|
| Plunging individual drains | ✅ Yes | Always try first |
| Snaking a drain (up to 25 ft) | ✅ Yes | Rent a drain snake from hardware store |
| Cleaning P-trap under sinks | ✅ Yes | Simple hand tools needed |
| Replacing wax ring on toilet | ⚠️ Maybe | Basic plumbing skill needed |
| Main sewer line snaking | ⚠️ Rent equipment | Requires 75–100 ft electric snake |
| Sewer camera inspection | ❌ Hire pro | Specialized equipment, interpretation needed |
| Any pipe excavation or replacement | ❌ Hire pro | Permits required in most jurisdictions |
| Trenchless repair (CIPP or pipe bursting) | ❌ Hire pro | Specialized equipment and training |
5. Repair Methods Compared
Once a camera inspection identifies the problem, you'll typically be offered one or more of these repair approaches. Each has distinct advantages depending on your situation.
Spot Repair (Localized Damage)
When damage is confined to a 1–4 foot section, a plumber can excavate just that area, cut out the damaged pipe, and splice in a new section. This is the most cost-effective approach when damage truly is localized. Cost: $500–$2,500 depending on depth and access.
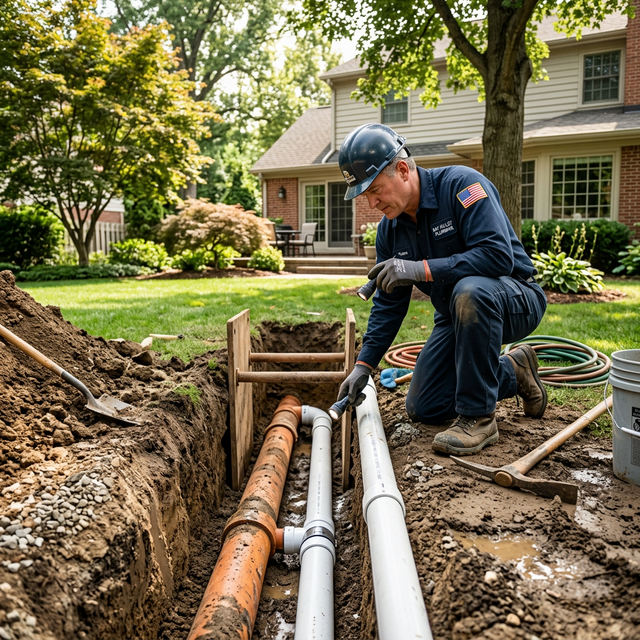
Open-Cut (Trench) Replacement
The traditional method involves excavating a trench along the full length of the damaged pipe, removing old pipe, and installing new PVC. This is necessary when a long section has failed or when pipe material (like Orangeburg) needs full replacement.
- Lower cost per linear foot than trenchless
- Allows full visual inspection during repair
- Best for severely collapsed or multiple-joint failures
- Requires significant yard restoration afterward
Cost: $50–$150 per linear foot + excavation and restoration
Trenchless Pipe Lining (CIPP)
Cured-In-Place Pipe Lining inserts a resin-saturated liner into the existing pipe, which is then inflated and cured with UV light or steam. The result is a brand-new pipe-within-a-pipe with a 50+ year lifespan. Full guide to trenchless repair →
- Minimal digging (access pits only)
- Preserves landscaping and hardscaping
- Completed in a single day
- Reduces pipe diameter slightly (~8–10%)
Cost: $80–$250 per linear foot
Pipe Bursting
A hydraulic head is pulled through the old pipe, fracturing it outward while simultaneously pulling a new HDPE pipe behind it. Suitable when the old pipe is structurally intact enough to guide the bursting head.
Cost: $60–$200 per linear foot
Small localized crack: Spot repair. Long line with tree roots and cracks: CIPP lining. Collapsed pipe or Orangeburg: Open-cut replacement. Severely deteriorated but structurally present: Pipe bursting. Always get 3 quotes.
6. Real Cost Breakdown (2026)

| Repair Type | Low Estimate | Typical | High Estimate |
|---|---|---|---|
| Drain snaking (professional) | $150 | $200–$350 | $500 |
| Hydro-jetting | $300 | $400–$600 | $900 |
| Camera inspection | $150 | $200–$350 | $400 |
| Spot repair (1–4 ft section) | $500 | $1,000–$2,000 | $2,500 |
| Pipe lining (CIPP) / 50 ft | $4,000 | $6,000–$8,000 | $12,500 |
| Pipe bursting / 50 ft | $3,000 | $5,000–$7,000 | $10,000 |
| Open-cut replacement / 50 ft | $2,500 | $4,500–$7,500 | $12,000 |
| Full main line replacement | $3,500 | $6,000–$12,000 | $20,000+ |
Always add 15–25% buffer for: permit fees ($100–$500), soil/tree restoration ($500–$3,000), driveway/concrete cutting and repair ($500–$2,000), and temporary bypass plumbing if the repair spans multiple days.
7. How to Hire the Right Sewer Repair Contractor
- Verify licensing and insurance. Your contractor must be licensed in your state and carry both general liability insurance and workers' compensation. Ask for certificates — not just their word.
- Get at least 3 written estimates. Each estimate should specify: pipe length being repaired, method, materials (pipe grade/brand), warranty terms, and whether permits are included.
- Demand a pre-work camera inspection. Any contractor recommending expensive repairs without a camera inspection first is a red flag.
- Check reviews on multiple platforms. Google, Yelp, and your state's contractor licensing board complaint database all tell different parts of the story.
- Ask about the warranty. Reputable trenchless repairs come with 25–50 year product warranties and at least a 1-year labor warranty. Open-cut work should include at least a 1-year guarantee.
- Never pay more than 10–20% upfront. Legitimate contractors don't need full payment before work begins. Staged payments tied to completion milestones are standard.
Pressure to sign same-day. No written estimate. Request for large upfront payment. "We found much worse damage" without new camera footage to prove it. No permit pulled for work requiring one. Unlicensed or uninsured crew.
8. Insurance & What's Covered
Most homeowners are shocked to learn their standard policy does not cover sewer line repair. Here's the reality:
| Coverage Type | Typically Covered? | Notes |
|---|---|---|
| Standard homeowners insurance | ❌ No | Only sudden/accidental interior damage covered |
| Sewer backup rider/endorsement | ✅ Yes (if purchased) | ~$50–$150/yr added to policy |
| Service line protection add-on | ✅ Yes (if purchased) | Covers exterior pipe from house to street |
| Home warranty | ⚠️ Sometimes | Read the fine print; many exclude sewer lines |
| Municipal responsibility | ⚠️ Varies | City owns the line from street to clean-out; you own from clean-out to house |
Contact your homeowners insurance provider and ask about adding a "service line protection" endorsement. For most homeowners in older neighborhoods, this $50–$150/year add-on is one of the best insurance investments you can make.
9. Prevention & Ongoing Maintenance
The best sewer repair is the one you never need. A proactive maintenance routine dramatically extends pipe life and catches small problems before they become expensive emergencies.
Annual Maintenance Checklist
- Run hot water down all drains once a month to clear grease buildup
- Use enzyme-based drain treatments quarterly (not chemical drain cleaners, which corrode pipes)
- Never pour grease, oil, or fat down any drain — always dispose in the trash
- Know the location of your sewer clean-out access point
- Trim trees planted near sewer line paths; choose sewer-safe species for new plantings
- Schedule professional sewer camera inspection every 3–5 years (every 1–2 years for homes older than 50 years)
If your home was built before 1980, there's a high probability your sewer line is clay or cast iron. Schedule a preventive camera inspection now — catching early root intrusion or cracking saves $5,000+ vs. waiting for a backup.